


How to Record a Screen Video on Mac: Easy Step-by-Step Guide

Learn how to record a screen video on Mac effortlessly. Discover simple methods using built-in tools to create perfect screen recordings on your Mac.
Introduction
Learning how to record a screen video on Mac is simpler than you might think, as Apple includes powerful, free tools directly within macOS. This guide will walk you through the two primary built-in methods: the instant Screenshot toolbar and the more robust QuickTime Player. You'll learn how to choose the right tool, configure settings for professional results, and apply these skills to real-world tasks.
Why This Topic Matters
Being able to quickly capture what's on your screen is a fundamental skill for clear communication, both at work and at home. Whether you're creating a software tutorial for your team, showing the IT department a recurring bug, or sharing a complex workflow with a colleague, a screen recording is often more effective than a lengthy email or phone call.
The demand for this skill is growing. The market for screen recording software was valued at around USD 1.5 billion in 2023 and is projected to more than double by 2033. Since Apple's ecosystem is a favorite in creative and professional fields, knowing how to record a screen video on Mac is an essential competency for millions of users.
Step-by-Step Guide: How to Record a Screen Video on Mac
Your Mac offers two excellent, free methods to record your screen. Understanding their differences will help you choose the right one for any situation. The Screenshot toolbar is designed for speed and convenience, perfect for instant captures. QuickTime Player offers more control, especially for recordings that require basic editing like trimming.
Method 1: Using The Screenshot Toolbar for Instant Captures
If you need to record your screen right now, the Screenshot toolbar is the fastest, most direct way to start. It's ideal for quick, informal recordings where speed is the priority.
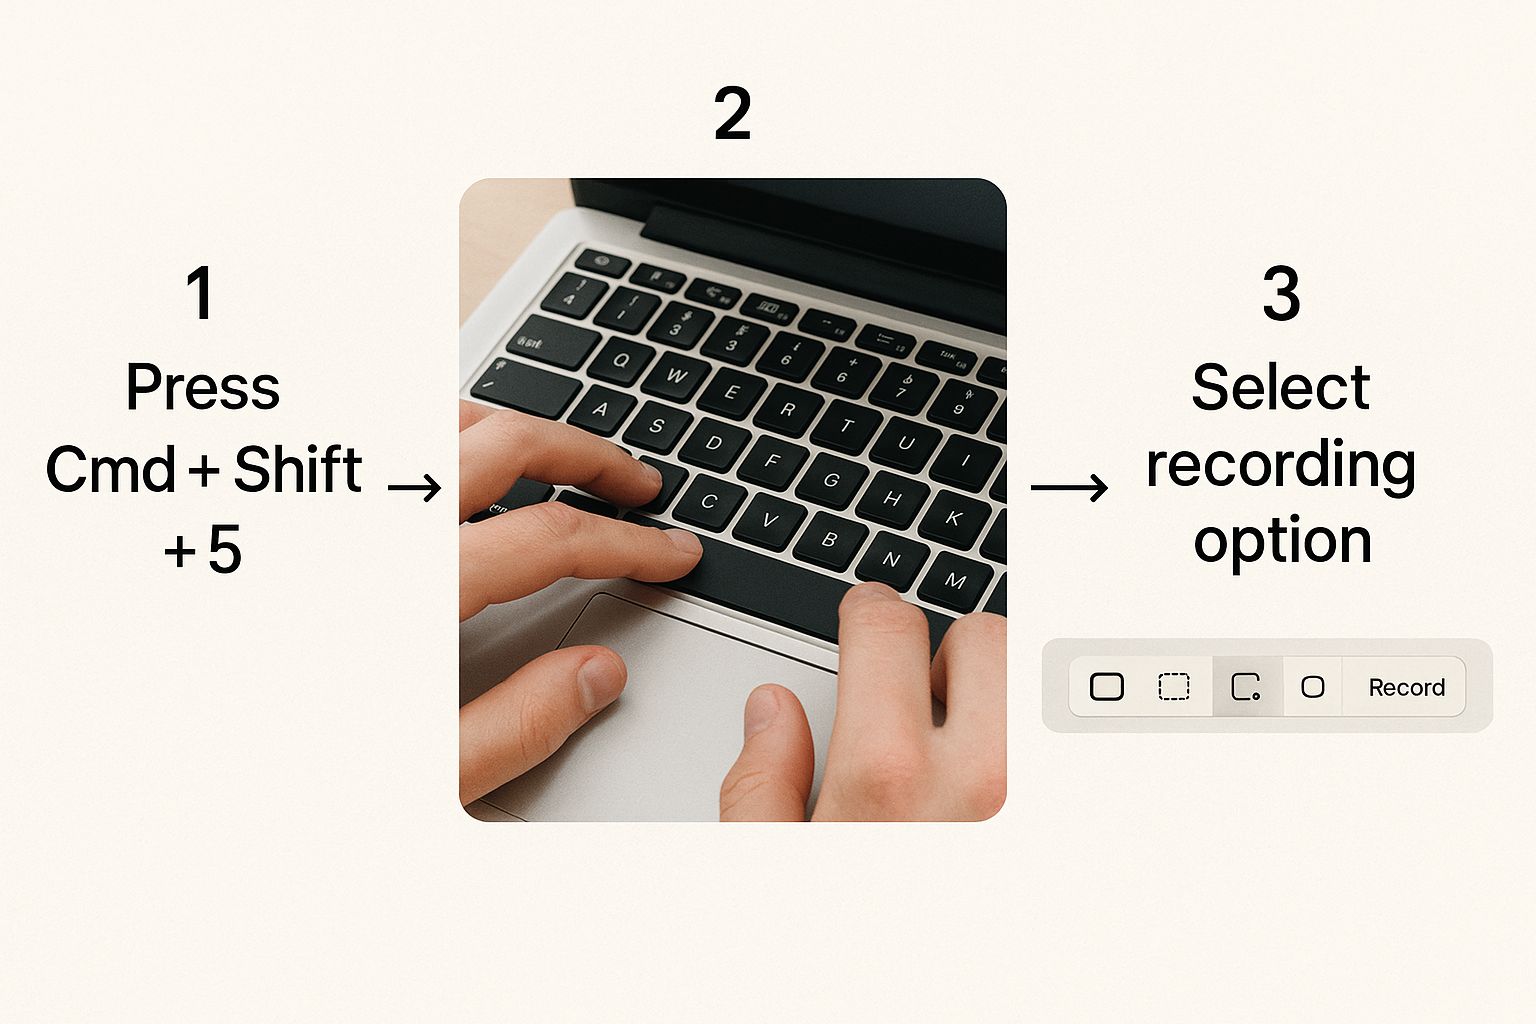
- Launch the Toolbar: Press the keyboard shortcut Shift-Command-5. A control panel will appear at the bottom of your screen.
- Choose Your Recording Area:
- Record Entire Screen: Click the icon that looks like a screen with a solid border. Your cursor will turn into a camera. Click anywhere to begin recording your whole screen.
- Record Selected Portion: Click the icon with a dotted-line box. Drag the frame to select the specific area you want to record. This is perfect for isolating a single app window.
- Configure Your Settings: Before recording, click the "Options" menu to customize your capture.
- Save To: Choose where the final video file will be saved (e.g., Desktop, Documents, or Clipboard).
- Timer: Set a 5 or 10-second countdown to give yourself time to prepare.
- Microphone: Select "Built-in Microphone" or an external mic to record your voice.
- Show Mouse Clicks: Enable this to add a visual circle around your cursor every time you click, which is great for tutorials.
- Start and Stop Recording: Click the "Record" button to begin. To stop, click the stop icon (a circle with a square inside) that appears in the menu bar at the top of your screen.
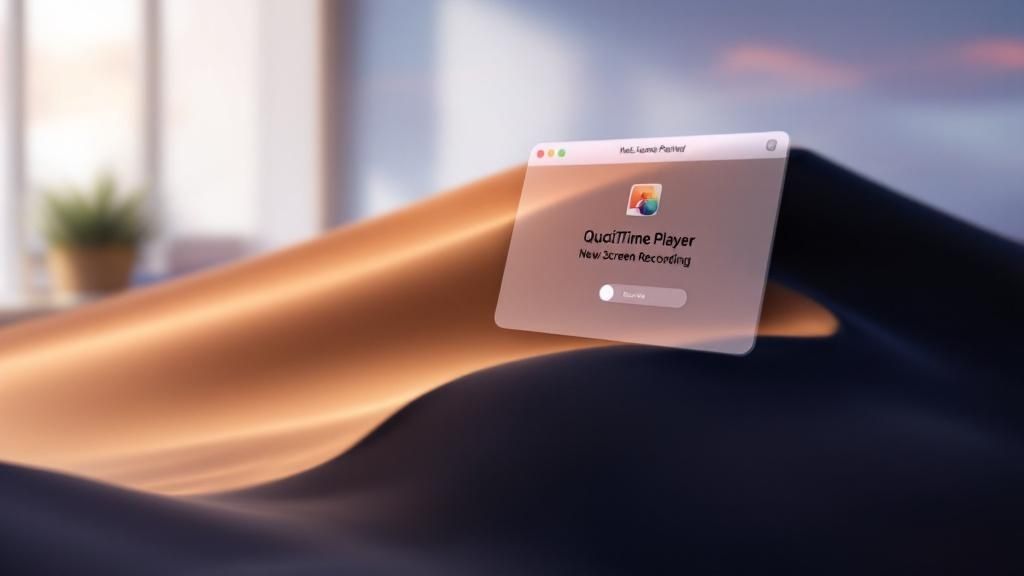
Method 2: Mastering QuickTime Player for More Control
For recordings that need a bit more polish, such as trimming mistakes from the beginning or end, QuickTime Player is the superior choice. It offers a seamless workflow from recording to basic editing.
- Launch QuickTime: Open QuickTime Player from your Applications folder.
- Start a New Recording: From the menu bar at the top, click File > New Screen Recording. The same control panel from the Screenshot toolbar will appear.
- Set Your Options: Click the "Options" dropdown menu next to the record button. Just like with the toolbar, you can select your microphone, choose to show mouse clicks, and set a save location. For a full walkthrough on sound settings, check our guide to learn more about recording your screen with audio in QuickTime Player.
- Record Your Screen: Click "Record" and capture your content. Click the stop icon in the menu bar when you're finished.
- Trim Your Video: This is QuickTime's key advantage. After you stop recording, the video opens automatically.
- Press Command-T or go to Edit > Trim.
- Drag the yellow handles on the timeline to select the start and end points of your video.
- Click the yellow "Trim" button to cut out unwanted sections.
- Save Your File: Go to File > Save to export your edited video as a .mov file.
Tips and Best Practices for Professional Recordings
Knowing the steps is one thing; creating a polished video is another. A little preparation can dramatically improve the quality of your screen recordings.
- Declutter Your Desktop: A messy desktop distracts viewers. Hide your icons or use a clean background for a professional look.
- Turn Off Notifications: Use your Mac's Focus mode to silence all alerts and prevent interruptions during your recording.
- Find a Quiet Space: Your microphone will pick up background noise. Record in a quiet room for crisp, clear audio.
- Speak Clearly and Slowly: Enunciate your words and speak at a deliberate pace. This helps viewers process information and follow along easily.
- Use Smooth Mouse Movements: Your cursor guides the viewer's eye. Avoid frantic, jerky movements. Move the cursor with purpose.
- Manage File Size: High-quality videos create large files. To keep them manageable, record only a selected portion of the screen instead of the whole thing, especially for longer sessions. For a deeper dive, check our comparison of the best free screen recorder for Mac.
Examples: Real-World Use Cases
The real power of screen recording comes from applying it to solve everyday problems. Here’s how to strategically use it in different scenarios.
Example 1: Creating a Video Lesson for Students
When creating a tutorial, clarity is key. QuickTime Player is the best choice because its trimming feature allows you to edit out mistakes and pauses, creating a polished, easy-to-follow lesson.
- Tool: QuickTime Player
- Key Settings: Use an external mic for better audio, enable "Show Mouse Clicks," and use the countdown timer to prepare your opening shot.
Example 2: Recording a Bug Report for Developers
When reporting a software bug, speed and precision are essential. A short video is far more effective than a long email. The Screenshot Toolbar is perfect for this task.
- Tool: Screenshot Toolbar (Shift-Command-5)
- Key Settings: Use "Record Selected Portion" to focus only on the app with the bug. Narrate your steps as you record to provide context. For more tips on this, see our guide on MacBook screen recording with audio.
Example 3: Demonstrating a Software Feature for a Client
For a client demo, professionalism is non-negotiable. QuickTime Player allows you to trim your recording for a clean start and finish, ensuring a polished presentation that gets straight to the point.
- Tool: QuickTime Player
- Key Settings: Clean your desktop beforehand, trim the video to remove any fumbling, and speak clearly and confidently.
FAQ: Frequently Asked Questions
Here are answers to the most common questions about how to record a screen video on Mac.
1. How do I record audio with my Mac screen recording? By default, macOS records video without sound. To include audio, you must enable it. Before you start, click the "Options" button in either the Screenshot toolbar or QuickTime's recording panel. Under the "Microphone" section, select "Internal Microphone" or any connected external mic.
2. Where do Mac screen recordings get saved? By default, all screen recordings are saved to your Desktop with a timestamped file name (e.g., "Screen Recording 2024-10-26 at 10.30.00.mov"). You can change this in the "Options" menu under "Save To" and select a different folder, like Documents or a custom "Recordings" folder.
3. Can I edit my screen recording on a Mac without extra software? Yes. QuickTime Player includes a simple but effective trimming tool. After you stop a recording, it opens in QuickTime. Press Command-T (or go to Edit > Trim), drag the yellow handles to cut out unwanted parts from the beginning or end, and click "Trim" to finalize the edit.
4. Why are my screen recording files so large? Macs save screen recordings as high-quality .mov files, which can be quite large, especially for long recordings or high-resolution displays. To reduce file size, record only a selected portion of your screen instead of the entire desktop and keep your videos as concise as possible.
Conclusion
You now have everything you need to record a screen video on your Mac effectively. We've covered the quick convenience of the Screenshot toolbar and the added editing power of QuickTime Player. The key takeaway is that your Mac comes equipped with powerful, free tools ready for nearly any recording task. The best way to master these tools is to practice, so try creating a short video today to build your confidence.
For more detailed guides, you can always check out our guide on how to screen record on a MacBook or learn more about recording video on your Mac.
Call-to-Action
Ready to move beyond the basics and create polished, shareable videos with advanced features like a teleprompter, cloud storage, and AI-powered transcriptions? ShotVu streamlines the entire process. Start creating professional videos today.